This is an abridged version of my Google Sites learning journal made for SAE.
Contents
Videos
My Custom Controller
This is a playthrough using my own scripts and movement. I changed it from third person to first person and gave the player the ability to do multiple jumps. With this version I also added narration that introduces the game.
The Template Controller
This is a playthrough using the modified scripts given. The movement was still the same as the vanilla script, which had many glitches and terrible movement.
Screenshots
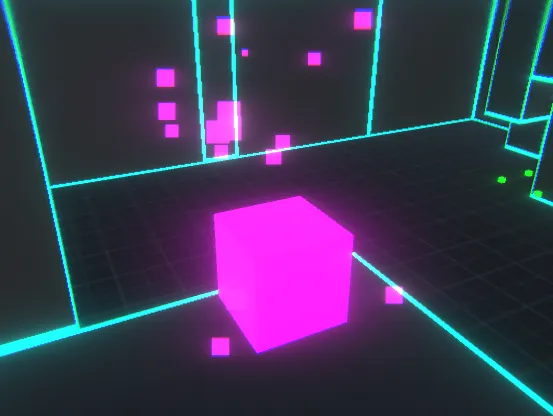
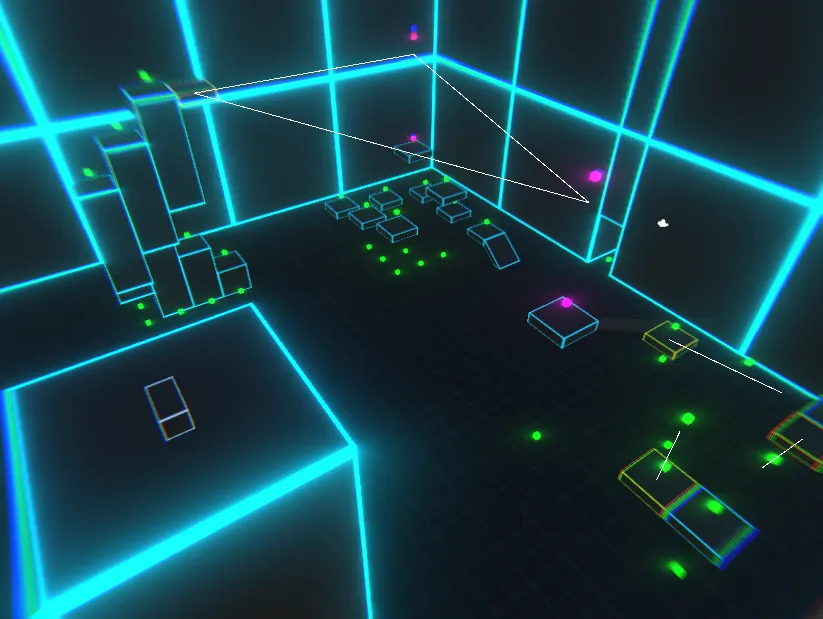
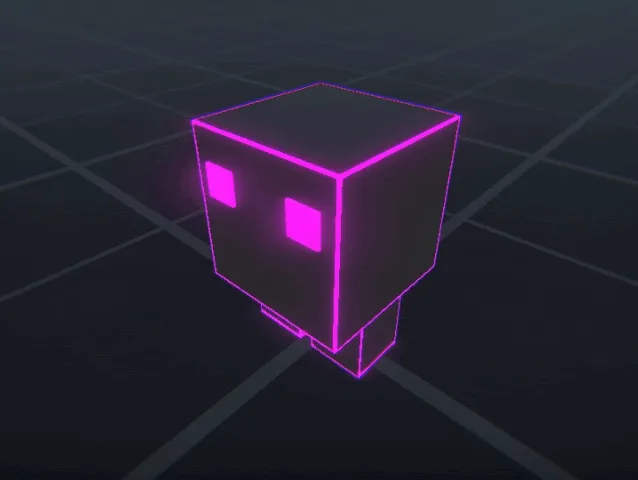
| Gem Particles | Level | Thing Blinking |
|---|---|---|
 |  |  |
’Narrator’ Script
This hurts my soul to read 💀
[Start]
Why, hello there. I didn’t expect to see you.
Well, no matter. Let me get this set up for you.
Just press the button and you can play outside.
[After activating door]
Mmmm
See those glowing objects? Just go right up and violate them.
Once you make enough feel uncomfortable you can unlock multiple jumps.
Then you just caress the spacebar while your feet aren’t on the ground to fly to the heavens
You don’t have to worry though. I stole those portal shoes like Dorothy did to that poor witch, only it wasn’t an accident.
So you can fall down and down and down without worrying about waking up facing the devil for what you did.
It’s just you and me until the end of time.
Oh and don’t worry about those things. They’re my personal projects. I do whatever I want to them. They have no choice but to obey me.
I don’t know if you know this, but there’s no way out. No end game, no goal, no cutscenes, no reward. You’re here forever.
Just you and me. I want you. Don’t attempt to leave. I know where you are. I can see you. You will be mine too.
I’m going to be here until you finally break. I will be watching, and eager my little one.
| Second Week | Third Week | Final Touches |
|---|---|---|
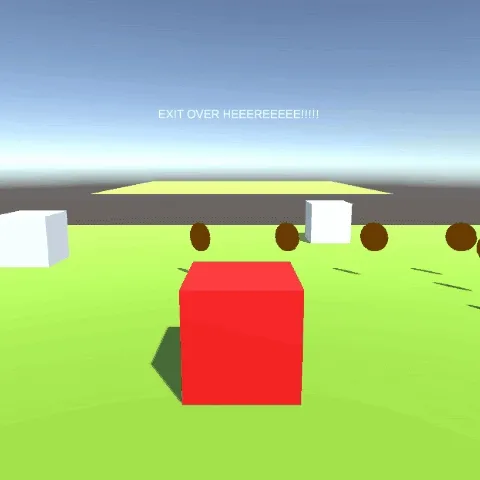 This week was focused on getting the player to move around, collect coins, and increase XP and stats. Also added moving platforms This week was focused on getting the player to move around, collect coins, and increase XP and stats. Also added moving platforms | 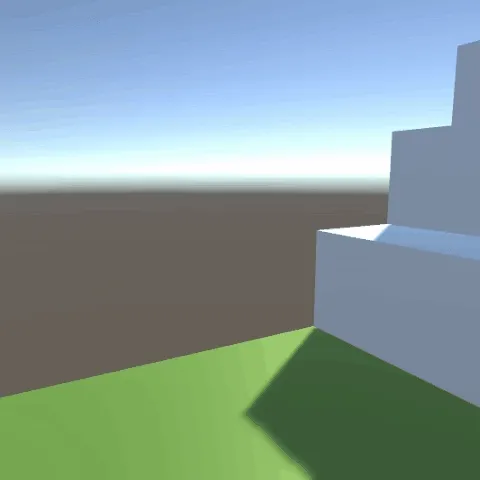 This week was focused on getting my first-person movement working, getting platforms working with my controller, and giving the player multiple jumps This week was focused on getting my first-person movement working, getting platforms working with my controller, and giving the player multiple jumps | 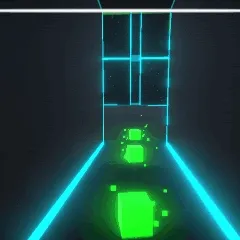 I decided in the final stretch to give the game an aesthetic. I added effects, sounds, narration, and even little characters (not shown in gif) I decided in the final stretch to give the game an aesthetic. I added effects, sounds, narration, and even little characters (not shown in gif) |
Brief Outline
| Page 1 | Page 2 | Page 3 |
|---|---|---|
 |  |  |
Project Solutions
Project Requirements
- Calculate the amount of experience points (XP) to be awarded for an interaction. The amount must vary with the player’s level
- Update the player’s current experience points when a successful interaction happens. As part of this you must detect if the player has gained enough XP to level up
- Update the player’s level and associated stats when a level up occurs
- Calculate the success chance of an interaction based on the player’s level and stats
There were a few scripts pre-made for us that we had to edit to get the game to work.
I have taken the extra step to rewrite it to barely resemble the original.
Experience
These pickups and their interaction fulfills project requirement 1 and 2.
The interactions I chose was strictly picking up the pickups, in this case I named them ‘gems’.
public void GainXP(int xpToGain){ // Increase xp by how much we pass through xp += xpToGain; // Log the xp gained, the current xp, and how much until next level Debug.Log("Gained " + xpToGain + " XP, Current Xp = " + xp + ", XP needed to reach next Level = " + xpForNextLevel);}This is the code snippet is the method that allows the player to gain experience.
All the pickups need to do is check when the player collides, or triggers, it and then call this method on the player with the pickups experience value.
| Green Gem | Pink Gem |
|---|---|
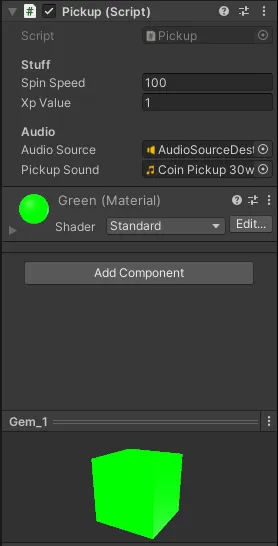 This gem gives only one experience This gem gives only one experience | 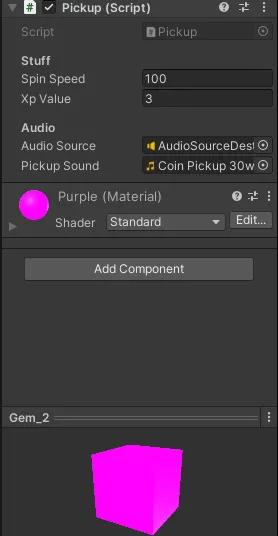 This gem gives a whopping three experience This gem gives a whopping three experience |
Changing experience points is simple as changing it in the inspector.
The field is public but it should actually be a serialized private field as we don’t want anyone to be able to change the value, and we never need to retrieve it from within another script.
As you can see this is exactly what is done.
I also added another check to see which player controller has entered the trigger, and then use the correct pickup method.
OnTriggerEnter is only called when the component is connected to a collider with ‘isTrigger’ set to true, and an object has entered the collider.
In other words, when the player enters the pickup.
private void OnTriggerEnter(Collider other){ // If the trigger has a collider enter that has the player tag if (other.gameObject.tag == "Player") { // If the player is the provided script, use that if (other.gameObject.GetComponent<PlayerController>()) { // Pickup the 'coin' PickupOld(other.gameObject.GetComponent<PlayerController>()); } // Otherwise if the player is my version, use that instead else if (other.gameObject.GetComponent<PlayerControllerFPS>()) { // Pickup the 'coin' PickupFPS(other.gameObject.GetComponent<PlayerStats>()); } }}This pickup function is for the given scripts.
It simply plays the pickup sound, adds the experience to the player, and then finally destroys itself.
private void PickupOld(PlayerController player){ // Play the pickup sound PlayPickupSound(); // Increase the players xp by this pickups xp player.GainXP(xpValue); // Destroy this object Destroy(this.gameObject);}Levelling Up
These fulfill project requirement 3.
This how the player controller levels up.
When the player levels up it sets all the stats together, I compiled them all into one script to make it easier to set them all.
void LevelUp(){ // Reset XP back down to zero xp = 0f; // Increase level level++; // Log the level Debug.Log("level" + level); // Set everything when we level up SetEverything();}Here are all the statistics that get set.
- Experience
- It is double the level
- Move speed
- It’s its current move speed with an extra 25% per level
- Turn speed
- It’s its current turn speed with an extra 10% per level
- Jump height
- It’s its current jump height with an extra 5% per level
- Lockpick skill
- It is the exact same as its level
- This could be changed to a property
// This sets all those variables that change depending on the player levelvoid SetEverything(){    SetXpForNextLevel();    SetCurrentMoveSpeed();    SetCurrentTurnSpeed();    SetCurrentJumpHeight();    SetLockPickSkill();}
// To level up you need to collect an amount of xp;// Each level you gain the xp required gets higher
void SetXpForNextLevel(){    xpForNextLevel = level * 2f;    Debug.Log("xpForNextLevel " + xpForNextLevel);}
// For each level, the player adds 25% to the move speedvoid SetCurrentMoveSpeed(){    currentMoveSpeed = this.intitialMoveSpeed + (this.intitialMoveSpeed * 0.25f * level);    Debug.Log("currentMoveSpeed = " + currentMoveSpeed);}
// For each level, adds 10% to the turn speedvoid SetCurrentTurnSpeed(){    currentTurnSpeed = this.initialTurnSpeed + (this.initialTurnSpeed * 0.1f * level);    Debug.Log("currentTurnSpeed = " + currentTurnSpeed);}
// For each level, adds 5% to the jump heightvoid SetCurrentJumpHeight(){    currentJumpHeight = this.initialJumpHeight + (this.initialJumpHeight * 0.05f * level);    Debug.Log("currentJumpHeight = " + currentJumpHeight);}
// Set the lock pick skill to the levelvoid SetLockPickSkill(){    currentLockPickSkill = level;}
Simple Chest
This fulfills requirement 4.
This is the function that calculates the chance of the player opening the chest.
It generates a number between 0 (inclusive) and 6 (exclusive). It then adds this number to the players lockpick skill and sees if this is bigger than, or the same as, the chest’s difficulty. The higher the players lockpicking skill the more likely they are to open the chest.
If the chance is successful it creates the gem and then destroys itself.
Otherwise, if the players level added with the max random value is lower than the chest’s difficulty, it just prints that you are not high enough level.
private void CheckIfLockPickIsSuccessful(){  // Get and store a dice roll. This will return 0 through to 5  diceRollResult = Random.Range(0, 6);
  // If the diceroll added with the lock pick skill is greater than the chest difficulty  if (diceRollResult + playerController.currentLockPickSkill > = chestDifficulty)  {    // Create a 'coin' (in this case gem) at this position    Instantiate(gem, transform.position, transform.rotation);    // Destroy this chest    Destroy(gameObject);  }  // Otherwise if the players skill and the highest roll is greater than the chest difficulty  else if (playerController.currentLockPickSkill + 5 < chestDifficulty>)  {    // Log how your level is not high enough    print("you are not a high enough level");  }}
Extra Credit
Once I finished following the requirements I decided I would make my own scripts that also follow along with the requirements. (There’s way more scripts and changes than listed, just going through the main ones)
Platforms
Due to my script being far too big I decided not to put it in here.
If you have access you can read the comments as it describes how it is done.
This is the script that sticks the player to a platform.
This is rather simple. If the collision object that collides with the platform is tagged as a player, then add it as a child. This is so the player is now attached to the platform.
I had troubles with the player not sticking to the platform. This was solved by making the platform move in ‘FixedUpdate’ rather than ‘Update’. I don’t know why but it does work.
This also meant that the platform movement stuttered, so to stop the apparent stutter I set the frame rate to the fixed update. This is so every frame rendered has an updated fixed update, masking the stutters.
/// On the platform stick script
private void OnCollisionEnter(Collision collision){    // If the object that entered is the player, make them a child of the platform    // Then add the player to the platform    if (collision.gameObject.tag == "Player")    {        platform.AddPlayer(collision.gameObject);        //collision.gameObject.transform.parent = transform;    }}
private void OnCollisionExit(Collision collision){    // If the player exits the collision, remove them from children    // Also remove from the platform    if (collision.gameObject.tag == "Player")    {        platform.RemovePlayer();        //collision.gameObject.transform.parent = null;    }}
/// In the platform script
public void AddPlayer(GameObject player){    this.player = player;    player.transform.parent = transform;}
public void RemovePlayer(){    if (player)    {        player.transform.parent = null;        player = null;    }}
/// Record the vector traveled by the platform to make sure the players footsteps don't bug out
private void UpdatePlayer(){    // If the player variable has been set    // Increase the walk sound position by the platforms move delta    // This is so the player's walking sound doesn't repeatedly happen on the moving platform    if (player && player.GetComponent<PlayerControllerFPS>())    {        player.GetComponent<PlayerControllerFPS>().previousWalkSoundPosition += positionDelta;    }}
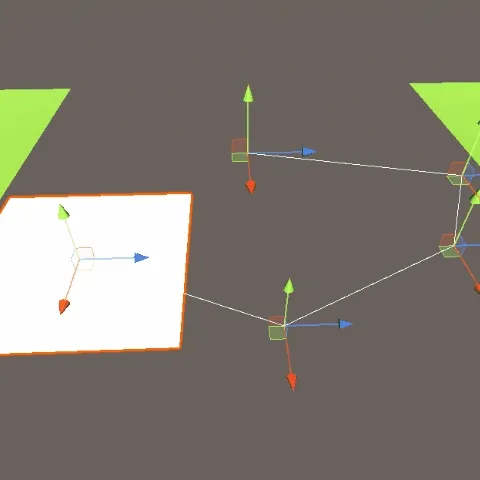
This is my custom editor script for the platforms.
This allows the user to easily modify the positions that the platform stop at by using ‘Handles.PositionHandle’.
‘Handles.PositionHandle’ allows us to create position handles in the scene view, with x, y, and z lines to change the position of the positions.
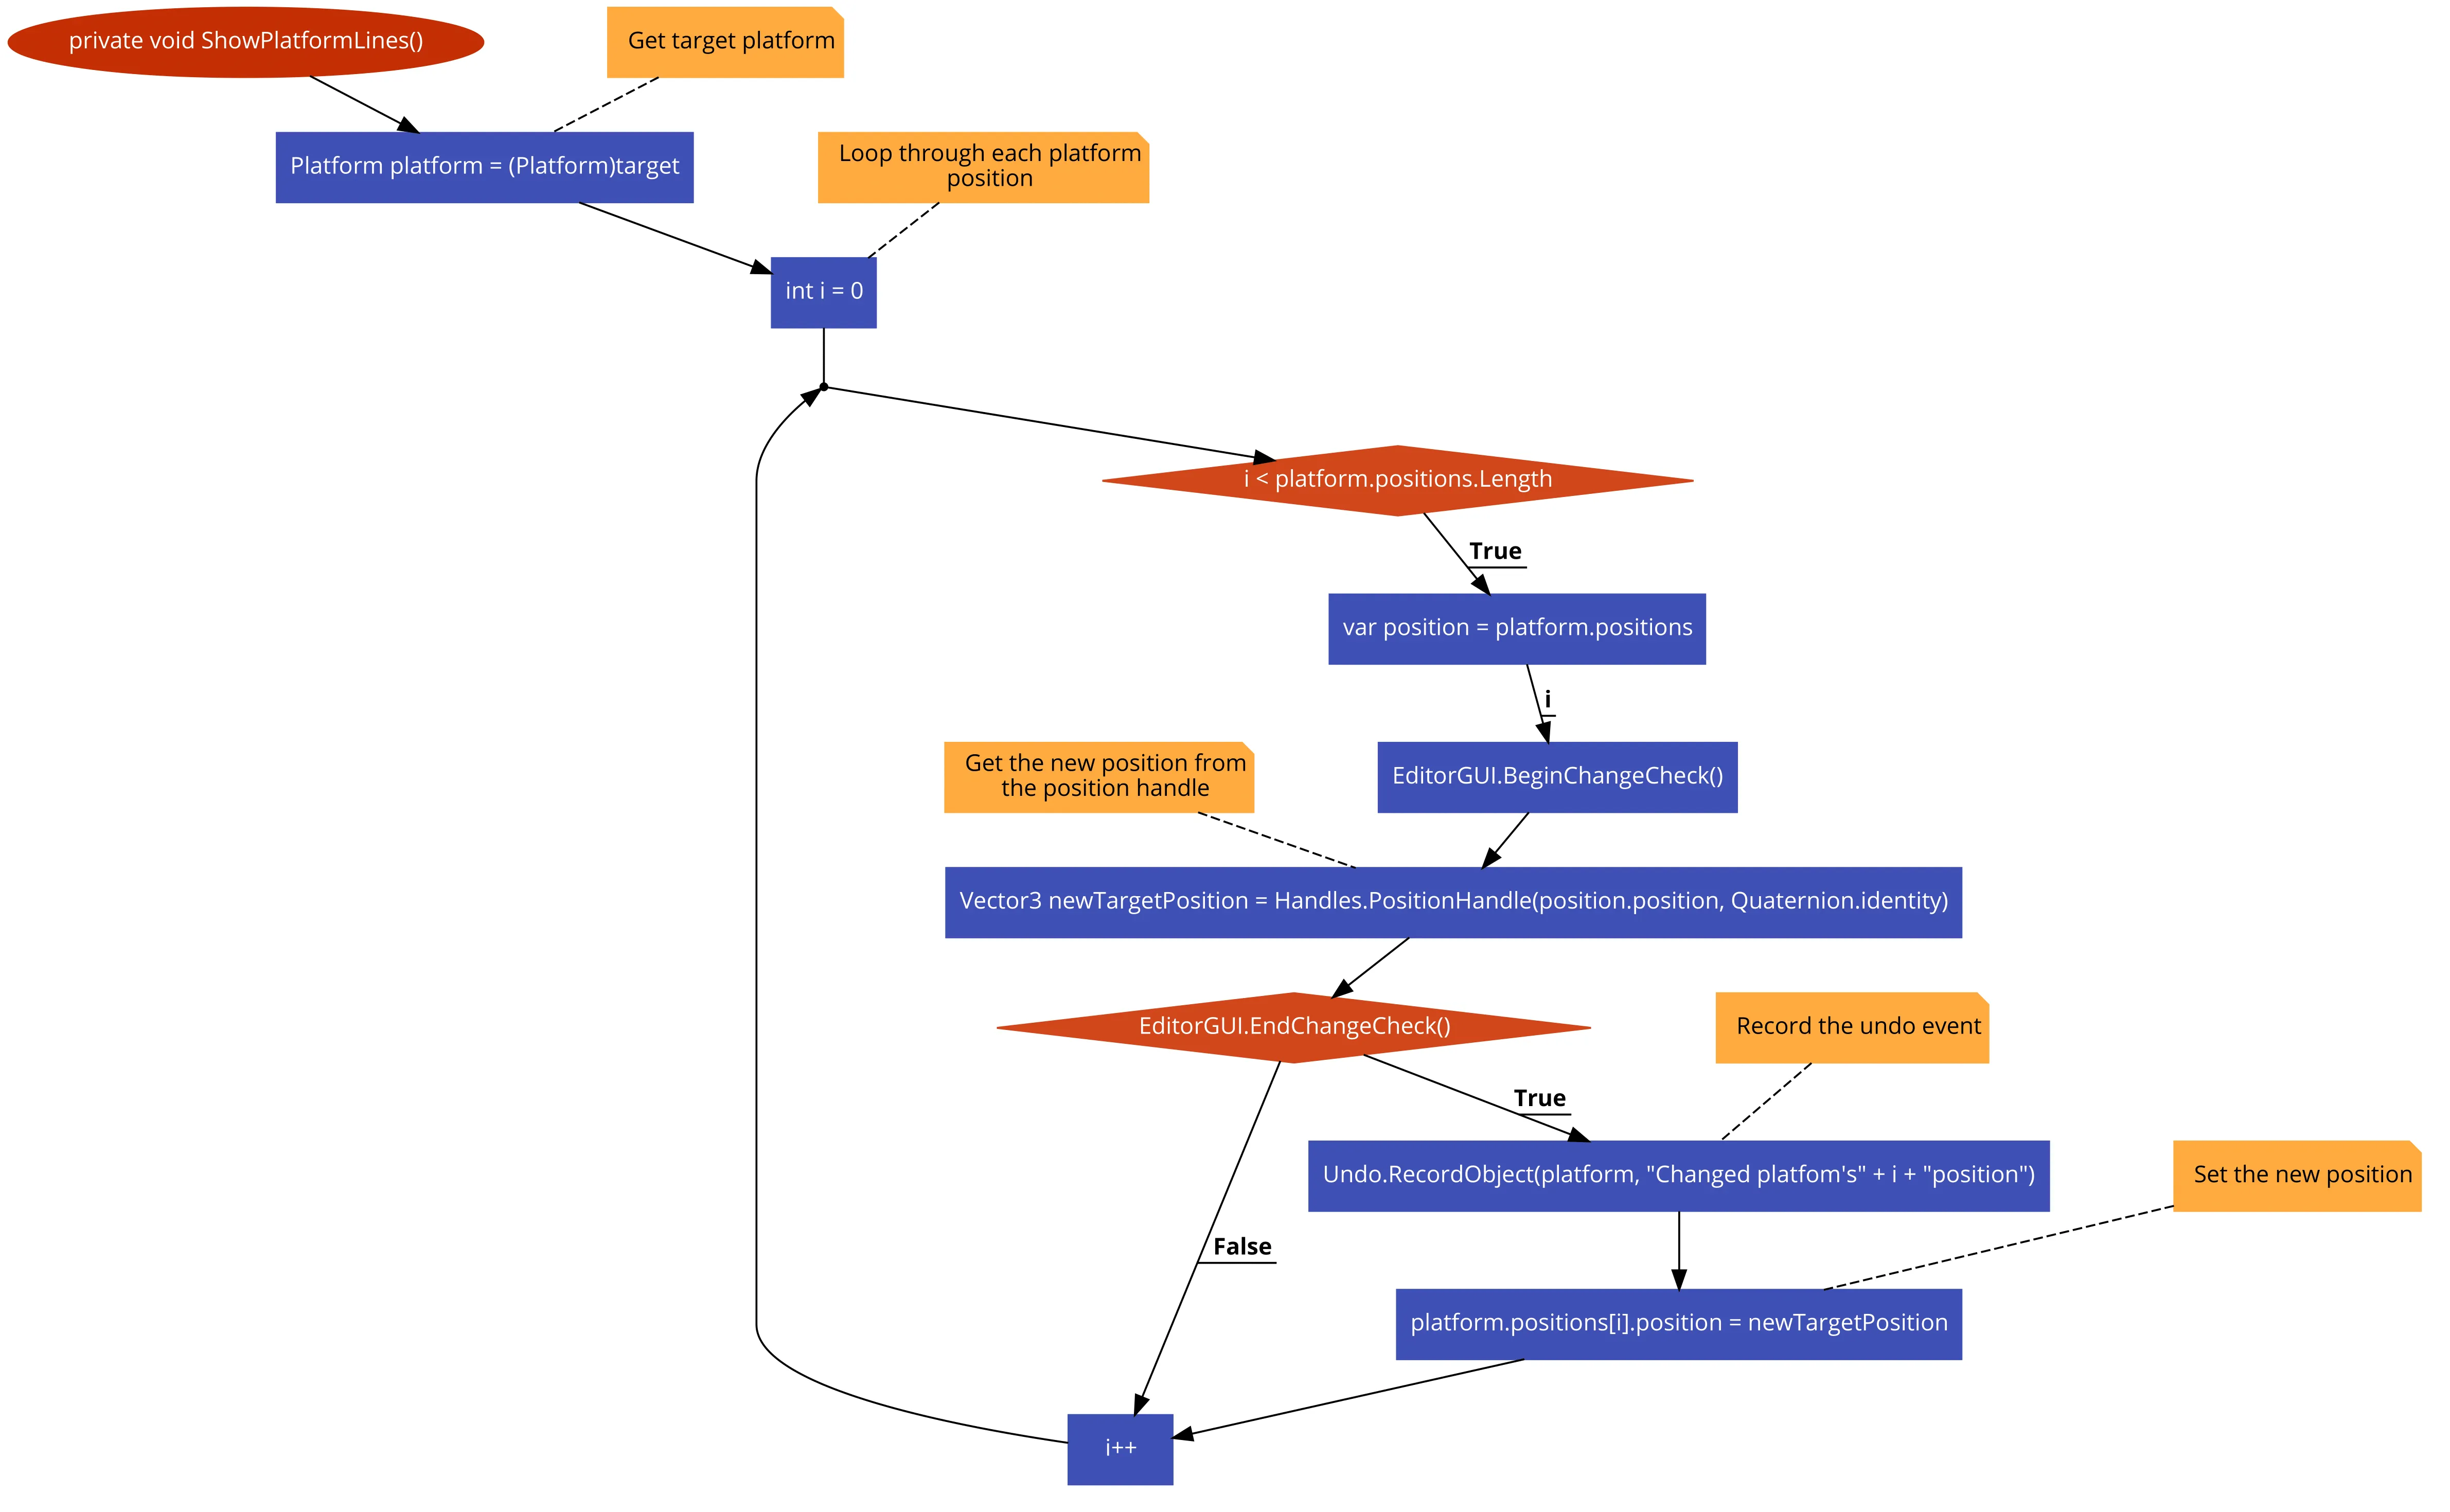
This script just gets all the positions of the target platform script, and then puts handles for each one (recording the object to allow it to be undone).
private void ShowPlatformLines(){    // Get target platform    Platform platform = (Platform)target;
    // Loop through each platform position    for (int i = 0; i < platform.positions.Length; i++)    {        var position = platform.positions[i];
        EditorGUI.BeginChangeCheck();        // Get the new position from the position handle        Vector3 newTargetPosition = Handles.PositionHandle(position.position, Quaternion.identity);        if (EditorGUI.EndChangeCheck())        {            // Record the undo event            Undo.RecordObject(platform, $"Changed platform's {i} position");            // Set the new position            platform.positions[i].position = newTargetPosition;        }    }}
Flow chart of the PlatformEditor method that’s used in ‘OnSceneGUI’ to show position handles to allow editing of the positions within the editor.
Player Controller
This is my custom movement script.
This was my attempt at velocity based movement.
I also removed the experience stuff from here and added them to their own PlayerStats class.
It didn’t work very well as I believe floating point precision errors caused erratic behaviour when the values weren’t large enough.
So I don’t this worked very well, though it does work for basic movement, just not as exciting :/
I’m not going to explain it here as it is commented in the script.
(Hind-sight Cyx here. I think it’s the way the Unity input handles button presses. I repurposed this script for Confinement)
private void DoMovement(){    // Get the vertical and horizontal input    control = new Vector3(Input.GetAxis("Horizontal"), 0, Input.GetAxis("Vertical"));
    // Clamp the magnitude    control.Clamp(1f);
    // Lerp velocity to zero    velocity.x = Mathf.Lerp(velocity.x, 0, Time.deltaTime * dampening);    velocity.z = Mathf.Lerp(velocity.z, 0, Time.deltaTime * dampening);    //velocity.ChangeMagnitudeClamped(-Time.deltaTime * dampening);
    // Impulse    Vector3 impulse = Vector3.zero;
    // Cos and Sin of camera rotation    float s = Mathf.Sin(cameraController.look.y * Mathf.Deg2Rad);    float c = Mathf.Cos(cameraController.look.y * Mathf.Deg2Rad);
    // Set impulse to control rotated by camera rotation    impulse.z = control.z * c - control.x * s;    impulse.x = control.z * s + control.x * c;
    // Add this impulse to the velocity    velocity += impulse * moveSpeed * playerStats.movementMultiplier * Time.deltaTime;
    // Reset downwards velocity if we are on the ground    // We want to do this before we jump, as otherwise it will reset the jump    if (characterController.isGrounded)        velocity.y = -gravity * 0.5f;
    // Add gravity to the player    velocity += Vector3.down * gravity * Time.deltaTime;
    // If the player is grounded, then we set jump variables to zero    if (characterController.isGrounded)    {        timeOffFloor = 0f;        consecutiveJumps = 0;    }    else    {        // If we are in the air, increase the time off the floor        timeOffFloor += Time.deltaTime;    }
    // If we press jump    if (Input.GetButtonDown("Jump"))    {        // If we can jump, then set upwards velocity to the jump force        if (CanJump)        {            Jump();        }    }
    // Move the player and store the flags    var flags = characterController.Move(velocity * Time.deltaTime);
    // Get if we have collided with something above us    var collidedUp = (flags & CollisionFlags.CollidedAbove) != 0; ;
    // If we have, set velocity downwards    if (collidedUp)    {        velocity += Vector3.down * gravity * Time.deltaTime;    }
    // If we are grounded this frame, but previous frame we were in the air    // Then we land    if (characterController.isGrounded && previousIsGrounded == false)    {        Land();    }
    // Set the previous is grounded    previousIsGrounded = characterController.isGrounded;}
Here is the function that sets the falling sounds volume.
Here are the steps:
- Get the speed of the player with offsets and scaling
- Clamp this value from zero to the maximum volume
- This is so we don’t lerp too fast when we set the current volume
- Lerp the current volume to the new value
- Set the falling audio source’s volume to the current volume
private void DoFallingSound(){    float value = characterController.isGrounded ? 0 : (-velocity.y + (gravity * Time.deltaTime) - 3f) / 10f;
    float volume = Mathf.Clamp(value, 0f, maxFallingVolume);
    currentFallingVolume = Mathf.Lerp(currentFallingVolume, volume, Time.deltaTime * 10f);
    fallingSource.volume = currentFallingVolume;}
Last one I’ll cover for the player.
This is to play a random jump sound when this function is called.
- It creates a random number from zero to the amount of jump sounds added to the component.
- It then uses this number to get an audio clip within the jump clips array.
- Finally it uses ‘PlayOneShot’ on the audio source to play the random sound.
private void PlayJumpSound(){    // Get a random sound    var randomSound = jumpClips[Random.Range(0, jumpClips.Length)];
    // Play it    jumpSource.PlayOneShot(randomSound);}
Interaction
This is inside the Update method.
This controller checks a raycast for a collider that has the Interactable component attached to it. It would be more performant if I was to have it checking a tag rather than using ‘GetComponent’.
If the player presses the interact button it calls ‘InteractWithChance’ on the interactable.
It also handles the UI for interaction hint.
void Update(){    // Set the interact hint to inactive    interactHint.gameObject.SetActive(false);
    // If the raycast hits something    if (Physics.Raycast(transform.position, transform.forward, out RaycastHit hit, maxInteractionDistance))//, float.MaxValue, ~LayerMask.NameToLayer("Player")))    {        // Check if it is an interactable        if (hit.collider.GetComponent<Interactable>())        {            // If we are looking at an interactable set the hint to true            interactHint.gameObject.SetActive(true);
            // If we press the interact button            if (Input.GetButtonDown("Interact"))            {                // Then we interact with the player stats to check the interaction                hit.collider.GetComponent<Interactable>().InteractWithChance(playerStats);            }        }    }}
The one below is interactable method.
It uses the player stats to check if the player has the required level, and then checks if the random chance was successful.
Upon a successful interaction it invokes the onInteract Unity action to allow other scripts to listen.
public virtual void InteractWithChance(PlayerStats stats){    // If we have interacted with the object, don't do anything    if (hasInteracted) return;
    // If our level is above the level required    if (stats.level >= levelRequired)    {        // Create a random number        var random = Random.Range(0f, 1f);
        Debug.Log($"Random number {random}");
        // If the random number is lower than the chance of this interaction        if (random <= chance)        {            Debug.Log($"Random number {random} is lower than {chance} so the object gets interacted with");
            // We have interacted            hasInteracted = true;
            // This is so it can tell other scripts it has interacted            onInteract.Invoke();        }    }    else    {        Debug.Log($"Level {levelRequired} needed");    }}
Below is the Chest script.
All is needed is to have the ‘Open’ method as a listener to the onInteract action of the Interactable.
It’s a very simple script thanks to the interaction scripts I made. I should have two interactables, one which interacts with no input and then another one that inherits and allows the PlayerStats to determine the chance.
public class Chest : MonoBehaviour{    // The gem to spawn    public GameObject gem;
    public void Open()    {        // Create a gem        Instantiate(gem, transform.position, Quaternion.identity);
        // Destroy the chest        Destroy(gameObject);    }}
Programming Techniques
Conditionals
Just simple comparisons
If (something == true){}// Ternaryint a = true ? 1 : 0;Loops
To do iterative processes, and index arrays
While(i > 0){  i++;}For(int i = 0; i < 0; i++){
}Foreach(var item in collection){
}
Coroutines
Great for doing things over time
// Methodprivate IEnumator Example(){ yield return new WaitForSeconds(2f);}// UsageStartCoroutine(Example());Braces
Used everywhere in code to keep things organised into their scopes
// {} These are used to encapsulate code within a methodprivate void Example(){
}
// [] and {} They are also used to create a list.object[] objs = new object[] { a, b, c };
// They are even used to encapsulate code in general. In this case a lamba.onEvent.AddListener(() => { Debug.Log("Event occured"); });
// They can even be used within strings. This allows variables to be parsed without needing +$"Example string with {number}"
Properties
Used to get and set member values, or even make a complex equation a property rather than a method
private Enemy[] enemies;private int NumberOfEnemies{ get { return enemies.Length; }}Weeks
These are just over-views of what I did every week.
Week 1
Unity
- Helped a few classmates get Unity and Visual Studio working
- Due to some pre-existing experience I decided to redo the scripts
- I decided to make the game I’m using for learning a first-person platformer
- I remade the player controller to use velocity based movement
- Coyote time
- Multiple jumps
- Head collision
- I created a camera controller that handles the first-person looking with the mouse
- I removed the coin script, and created my own pickup script
Scripts
The camera controller just gets mouse input, and then clamps the rotations, it’s very simple.
Below is the movement from my PlayerController script. This didn’t take too long as I have done velocity input before, but I did forget how to rotate a 2D vector.
Below the image is the website I used to figure out how to rotate a 2D vector by an angle
private void DoMovement(){    // First we get the inputs as x and y    control = new Vector3(Input.GetAxis("Horizontal"), 0, Input.GetAxis("Vertical"));
    // We then lerp the velocity to zero with dampening    // This will slow the player down    velocity.x = Mathf.Lerp(velocity.x, 0, Time.deltaTime * dampening);    velocity.z = Mathf.Lerp(velocity.z, 0, Time.deltaTime * dampening);
    // Then we get the camera's rotation, rotate the controls vector, this is now the impulse    Vector3 impulse = Vector3.zero;    float s = Mathf.Sin(cameraController.look.y * Mathf.Deg2Rad);    float c = Mathf.Cos(cameraController.look.y * Mathf.Deg2Rad);    impulse.z = control.z * c - control.x * s;    impulse.x = control.z * s + control.x * c;
    // If the player is not grounded, then we want the player to fall using gravity    if (!characterController.isGrounded) velocity.y += Physics.gravity * Time.deltaTime;
    // If the player is grouded, and we press jump, then set the vertical velocity to the jump    if (characterController.isGrounded && Input.GetButtonDown("Jump")) velocity.y = jumpForce;
    // Add the ipulse to the velocity    velocity += impulse * speed * Time.deltaTime;
    // Move the character by the velocity    characterController.Move(velocity * Time.deltaTime);}
Below is the addition of coyote time and multiple jumps.
I have a small buffer of time when leaving the ground to allow for jumps. This makes jumping feel better and is a common technique amongst the best platformers. The ability to do multiple jumps is determined by if the player missed the first jump or not, and then allows every other jump to be performed regardless if the player got the first jump or not.
// If the player is grounded, then time off the floor is zero, same with jumpsif (characterController.isGrounded){    timeOffFloor = 0f;    consecutiveJumps = 0;}else{    // If we are in the air, increase the time off the floor    timeOffFloor += Time.deltaTime;}
// If we press the jump buttonif (Input.GetButtonDown("Jump")){  // Store jump  bool canJump = false;
  // If the time we are off the floor is still in the coyote buffer, and it's the first jump  if (timeOffFloor <= coyoteTime && consecutiveJumps == 0)  {        // Increase jumps        consecutiveJumps++;        // We can jump        canJump = true;  }    // Otherwise if the consecutive jumps is under the max    else if (consecutiveJumps < maxJumps)    {        if (consecutiveJumps == 0)            consecutiveJumps = 1;
        // Incease jumps        consecutiveJumps++;        // We can jump        canJump = true;    }
    // If we can jump, then set upwards velocity to the jump force    if (CanJump)    {        velocity.y = jumpForce;    }}
These are recreations as the original were png’s.
I used my scripts as a template, but with how different they are I pretty much had to rewrite these from scratch lmao. It’s crazy that even for this project I pretty much rewrote everything multiple times.
Below is the detection for head collisions. Before I added this the player would hover on objects above their head when jumping. To counteract this, I found a resource online that allowed me to detect the head collision on the CharacterController, and just set the velocities up to zero.
// Move the character by the velocityvar flags = characterController.Move(velocity * Time.deltaTime);
// Check head collisionvar collidedUp = (flags & CollisionFlags.CollidedAbove) != 0; ;
// If the player hits head, set the vertical velocity to zeroif (collidedUp){ velocity.y = 0;}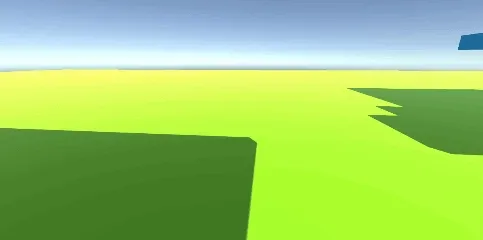 | 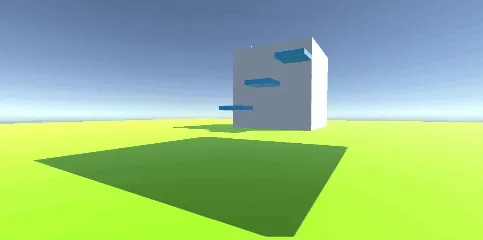 |
|---|---|
| The movement feels floaty due to the fall speed being too low. | This is after the addition of the coyote time, multiple jumps, and an increase in fall speed. Also added collectable items. |
Reflections
During the class, he skipped over how to install Unity and Visual studio leaving many of the students confused about how to set up Unity, which I helped a few set it up. Next time in class I’ll try to see if I can get him to elaborate on some of the processes.
Week 2
Unity
- Followed along with the instructions
- Created Player with the script and made it a prefab
- Created Coin with the script and then made it a prefab
- Tested level, coins can be picked up and colliders stop the player
- Added new coins with different XP values
- Bronze
- Silver
- Gold
- Followed along with adding the jump, and added the ability to level up jump
- Increased the move speed level up
- Stretch goals
- Added a moving platform
Scripts
Rigidbody Movement
Rigidbody movement was not implemented well
The check for the player being on the ground is to check if the player’s velocity is lower than a threshold, this means that you can jump when on the ground or at the apex of your jump (when timed right). Another reason to move to character controller as it does the checking for you
It also used the rigid body to move the player downwards. Due to rigid bodies moving only on physics updates, it caused stuttered motion. This could be remedied by making the rigid body interpolate, although this can cause unwanted physics side-affects. Another reason to move over to the character controller
Platforms
I decided to make moving platforms
I wanted to make the platforms follow a path that could easily be edited, so I looked it up. Turns out you can use ‘Handles.PositionHandle’ within a custom editor to allow the points to be translated within scene view. I have used editors before so it wasn’t too difficult to implement
https://docs.unity3d.com/ScriptReference/Handles.PositionHandle.html
I was having a look at maybe using bezier curves, but I think it’s too much for this project
https://catlikecoding.com/unity/tutorials/curves-and-splines/
I decided to make the platforms not use the animator, that way I can just make it points that you can move around rather than having to redo the animations for every point. In order to keep the player stay on the platform, I make it a child of the platform when it enters collider, and gets removed when it exits
Main Project
 |  | 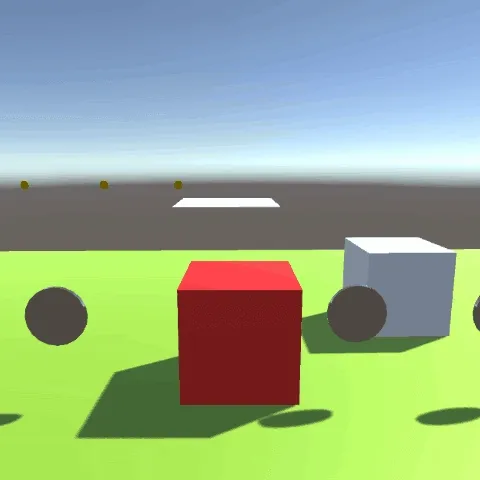 | 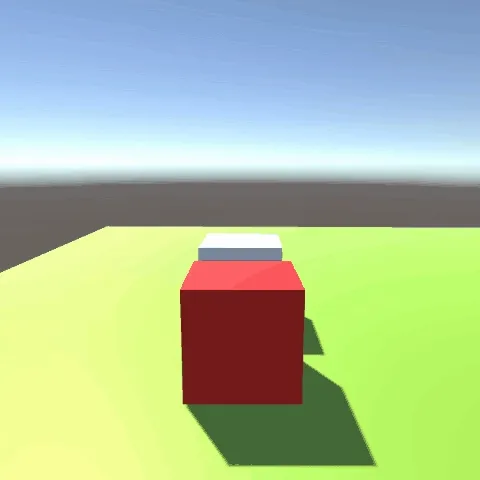 |
|---|---|---|---|
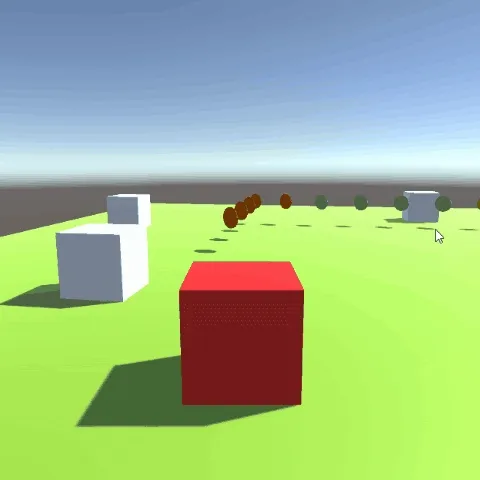
| Coins being picked up | Jumping over gap using levels | Platform movement | Clipping due to bad movement code |
Platform testing
| Failed | Loop | Reverse |
|---|---|---|
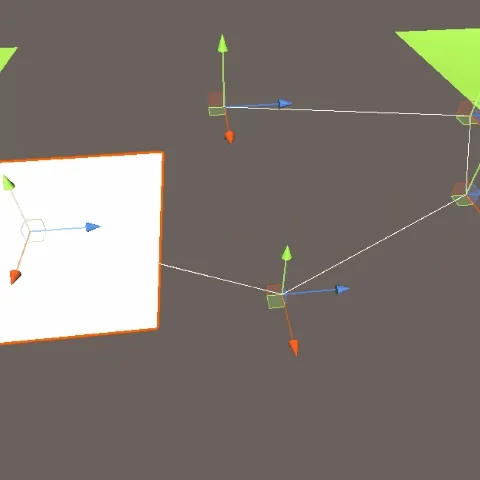 | 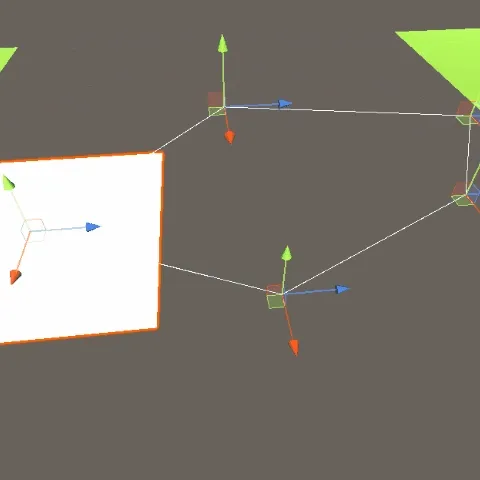 |  |
| This was the first attempt at my revised code | This was the finished product for the loop. This also contains the pausing for each point | Finished the reversing if the platform doesn’t loop. For this one I set the linger time to zero |
Reflections
Due to a misunderstanding, I didn’t end up following exactly what we were supposed to do. I had gems and pickups but we were supposed to edit the scripts given to show we know how it works. So I have gone ahead and created a separate project in which I will follow exactly what is required, while also creating a separate project that also follows the guidelines just without using the given code. This could’ve been avoided if clarification was achieved from either party. Next time I’ll try not to jump to conclusions and ask for reiteration or clarification.
Figuring out how to get the platforms to move between all the positions was quite a challenge. I first tried to hard code all the checks in before I realised the modulo operator would be a much nicer solution. So I ended up redoing the whole script. I wish I took a screenshot of my original script to show how bad it was. I will start trying to take more pictures and gifs of my failed attempts.
During this week I learnt how to use Unity PositionHandles. It’s the first time I’ve used them, and they are amazing.
Resources
- https://docs.unity3d.com/ScriptReference/Handles.PositionHandle.html
- https://catlikecoding.com/unity/tutorials/curves-and-splines/
Week 3
Unity
I made the character use CharacterController rather than then rigid body movement. This is because the rigid body movement has flickering motion due to using FixedUpdate, which can be remedied with interpolation, but this causes weird physics results and so I prefer to use the CharacterController.
I also changed it to first-person and added a camera.
I had a problem with the CharacterController though. It does not move with the parent, which means my platform script didn’t work. So instead I decided to make the platform move the player by how much it moved in the previous frame. Now the player follows the platform, though the movement is weird (this could be because of floating-point addition). I will hopefully look into better ways of doing this. Nevermind, I ended up going back to the original parenting but converted the coroutine method to normal methods to allow it to run in the fixed update. I found out about this online.
I also had a problem with the player floating when he hits his head, this was fixed by giving the right condition.
Platform Grip
This script was to allow the player controller to move along with the platform
Initially, this was a part of the platform script, but I decided to move it to its own script. This was because this script needs to be attached to an object with a collider, whereas the platform script itself does not necessarily contain a collider.
It used to just need to set it as a parent, and then remove it. When it was a rigid body the player would follow along as if it was attached to the parent, but CharacterController doesn’t do this.
I first tried to have the platform move the player with the Move method on the character controller, though this caused the weird movement. So I then tried SimpleMove, but this didn’t work at all. I finally tried to move the position itself, but alas nothing. So I looked it up and it turns out you just disable, move, and re-enable. This is where it gets interesting, turns out just disabling and enabling while it’s a child works fine. Don’t know why, but it works so eh.
public Platform platform;private CharacterController player;
private void Update(){    if (player)    {        //player.Move(platform.positionDelta);        //player.SimpleMove(platform.positionDelta);        player.enabled = true;        //player.transform.position += platform.positionDelta / 4f;        player.enabled = false;    }}
private void OnCollisionEnter(Collision collision){    // If the object that entered is the player, make them a child of the platform    // That means any movement made by the platform will be mirrored in the player    if (collision.gameObject.tag == "Player")    {        player = collision.gameObject.GetComponent<CharacterController>();        collision.gameObject.transform.parent = transform;    }}
private void OnCollisionExit(Collision collision){    // If the player exits the collision, remove them from children    if (collision.gameObject.tag == "Player")    {        player = null;        collision.gameObject.transform.parent = null;    }}
Additional
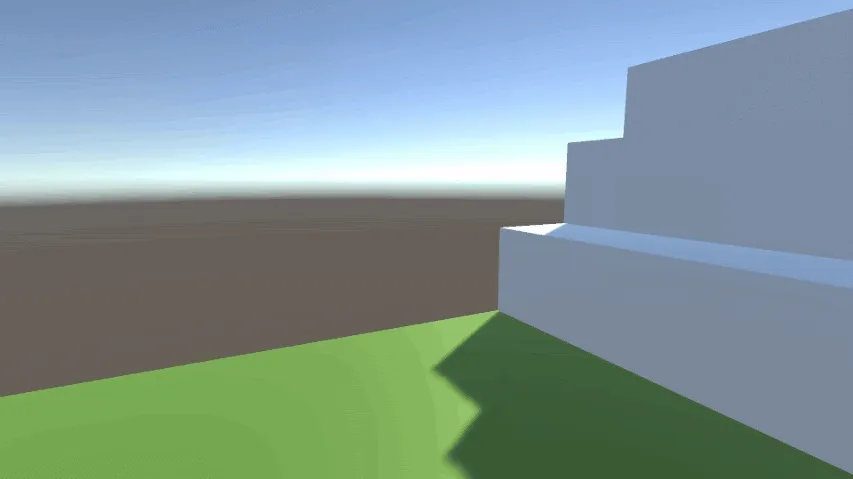
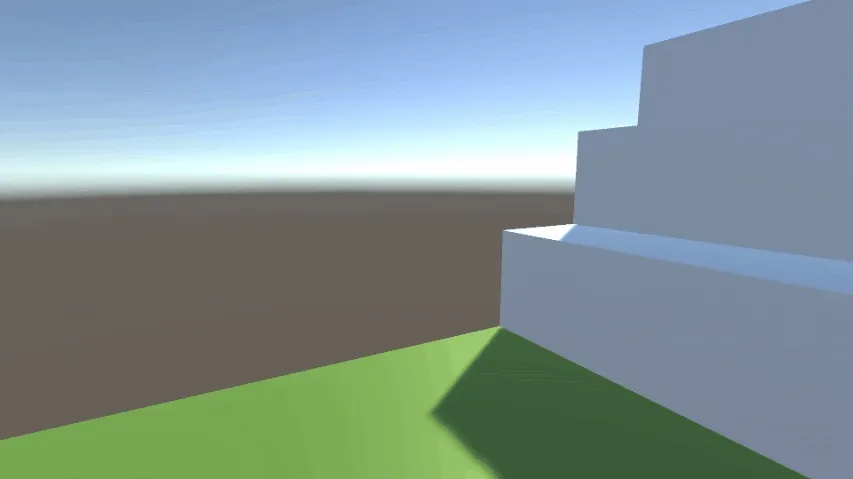
Uhh yeah, this stopped working after I re-opened the project. I have tried another method that has seemed to work. Instead of having the platform movement in the update function, I do it in FixedUpdate (I found this out through research). The problem with this is that the movement of the platform is now jittery, I will be looking at what I can do about this.
| Platform - Update | Platform - FixedUpdate |
|---|---|
 |  |
Reflections
Focused too much on trying to ‘perfect’ my code rather than getting the base requirements done first. This is a simple solution, just work on the main requirements before refactoring.
I keep moving on to making the scripts myself rather than modifying the ones provided. Next week for the final week I’ll focus on getting the provided scripts working, and then document both my version and the ones provided.
Working on the moving platform took way too long. It took me too long to finally search for solutions, which did help with solving the issue. In the future, I can research when I seem to have troubles that haven’t been solved with a few tries that haven’t improved the problem.
These lessons are necessary when efficiently creating and testing code. Applying it in the future is just a matter of understanding these shortcomings, and slowly learning what I should be doing instead.
Resources
- https://forum.unity.com/threads/does-transform-position-work-on-a-charactercontroller.36149/
- https://forum.unity.com/threads/character-controller-move-with-a-moving-parent-in-2018-3.568843/
Week 3 Extra
A lot was achieved this week. So I’ll boil these down to dot points and images.
Added sounds for walking, jumping, falling, and landing.
Visuals
| Neon Art Style | Coins Are Now Gems |
|---|---|
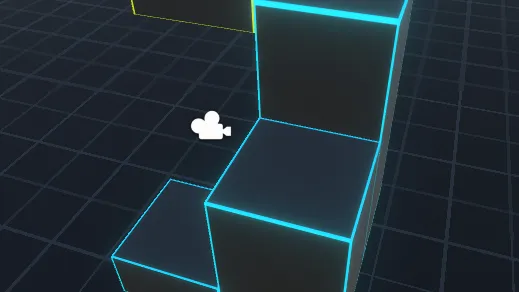 | 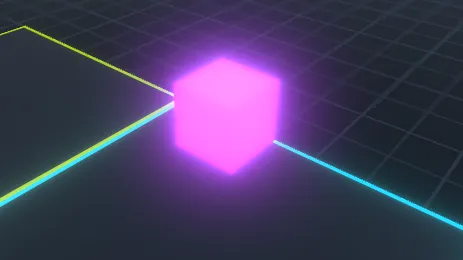 |
| I wanted an easy art style to implement, so I used contrast and bloom to create a neon aesthetic | Instead of coins, I thought these ‘gems’ would fit the art style better. All other images are using linear colour space, instead of gamma |
| Created a Level | Particles! |
|---|---|
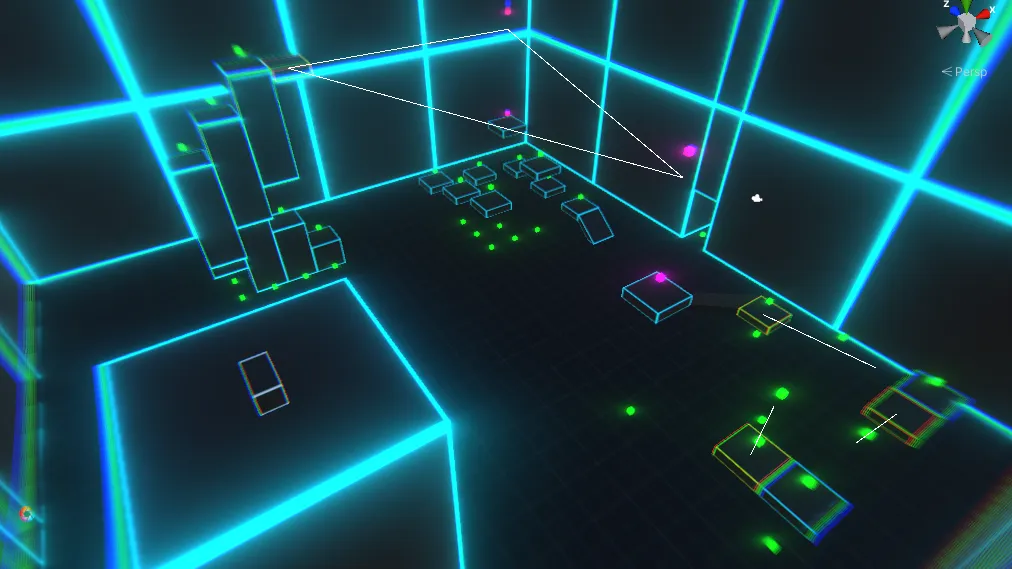 | 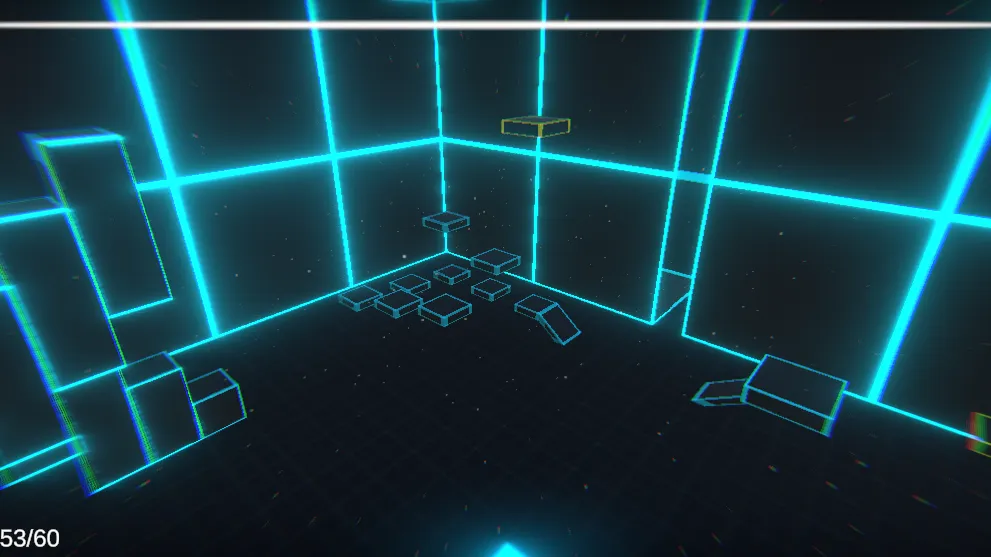 |
| This level contains sections that are unreachable until certain levels are reached, and abilities gained or have increased sufficiently | I decided to add a dust particle system to liven up the scene |
| Gem Particles!! | All the Particles!!! |
|---|---|
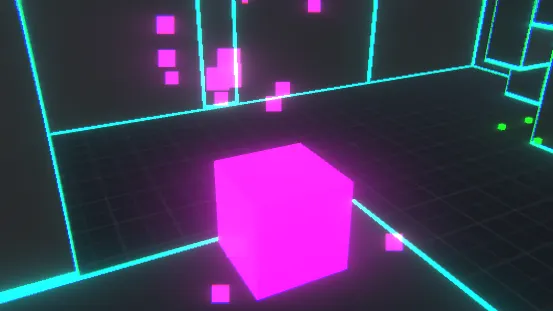 | 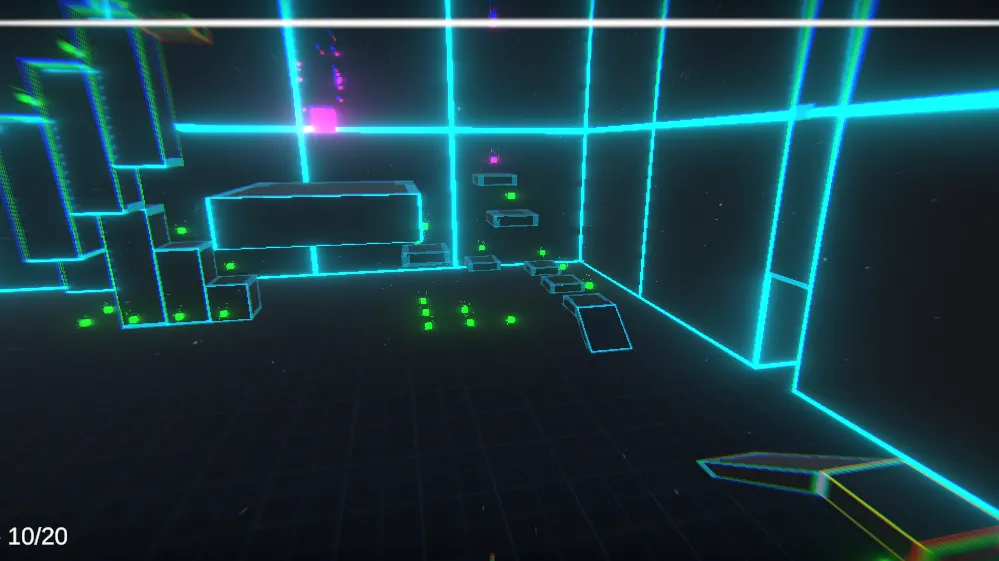 |
| I added a particle effect for the gems to make them more appealing Purple gems have a taller effect to give them more importance | This is a screenshot of all the particles |
Main Glitches
This is using the scripts provided.
Due to moving the player’s position rather than adding velocity it has caused a clipping glitch. This is another reason why I moved over to the character controller for my first person version.
Uh oh, the gif won’t play when it’s in this container ;-;
(gif is broken. no gif for u)
Things
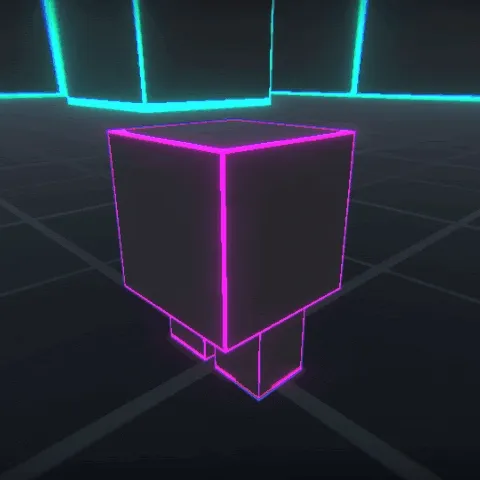
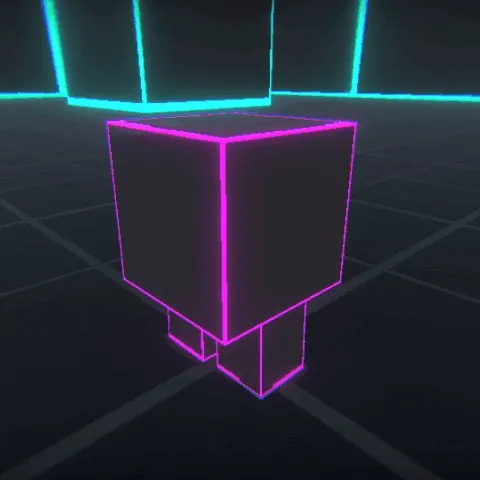
I decided to make little things that walk around the map. I call it ‘Thing’, real creative I know. I had time, so eh.
It uses NavMeshAgent and NavMesh for movement. And it just checks if the agent has stopped, then counts down a timer, and if the timer finishes it selects a new position.
| Thing Idle | Thing Walking | Thing Movement |
|---|---|---|
 |  |  |
| Thing Eyes | Thing Blinking |
|---|---|
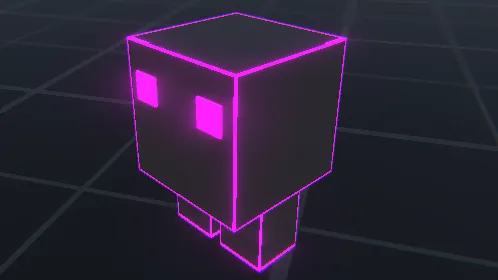 | 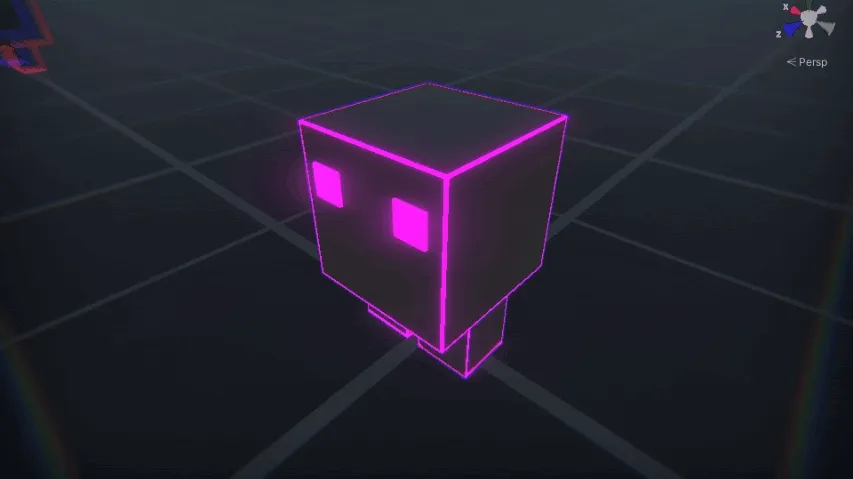 |
| I was told by a peer to add eyes, so I added them | Naturally, I had to make them blink |
Final Things ᵔᴥᵔ
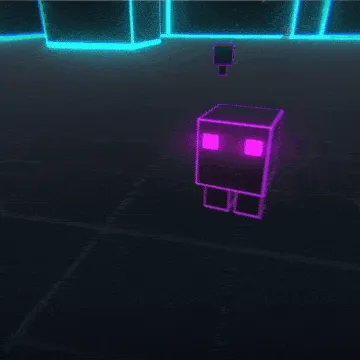
This is the final look of the things.
This is what they look like when in the game.
They do get stuck just infinitely walking into each other, but I don’t want to put anymore time into this project, I have already done way more than enough XD
Resources
Help
- How to check if the audio source has finished playing
- How to edit particle system curves
- How to build NavMesh
- How to tell when a NavMeshAgent reaches its destination
- How to start an animation at a random time
- How to make a demonic sounding voice in Audacity
- How to use right analogue stick
Assets
- Walking sound effects
Week 4
Unity
- I added comments to all my code to discuss what each line did, and the purpose of the code
- Refactored some of my code
- I helped some of the other students with their code and ideas
- I helped a student create an animation for their Llama
- I also helped them code it so when they move the walking animation will play
- I made them follow my instructions to hopefully help them understand how to do it
Learning Outcomes
LO1. Apply procedural programming techniques to manipulate data within an existing game framework.
- Edited, refactored, and recreated the given scripts to fit my implementation
- Manipulated values to reflect leveling up and stat increases
- Created custom scripts that ‘improve’ on the existing technique
LO2. Demonstrate sending and receiving of events within a gameplay system.
- Used messages to receive collision data and perform actions using them
- Used UnityActions to invoke listeners
LO3. Describe and apply basic Object Oriented programming concepts. Encapsulation
- Created private fields only accessible through properties or methods Polymorphism
- I could’ve used this to allow the interactable to be interacted with, without chance. This is an easy implementation
- Interact(PlayerStats stats) and Interact()
LO4. Describe program flow of fundamental game systems using diagrams and pseudocode.
- Used pseudocode to prototype ideas
- code2flow flow chart of my platform editor script
Post Mortem
Week 1
Within this week it was basically learning how to maneuver through the SAE sites and understanding the teaching structure.
We learnt about how to use some basic functions of Unity such as; creating scripts, adding components, camera, and adding objects to the scene.
This week was more enjoyable for me in terms of helping other students understand the engine and fixing any issues that they had.
I did not learn anything this week in terms of Unity.
Week 2
This week I tested out the given scripts and wrote up my reasoning for not liking them.
The tldr is that it was using rigidbody for collision but the movement altered the objects position directly, which caused clipping issues.
In this week I did stretch myself to create a platform script that would allow the user to add as many points as they liked, I even tried to allow them to decide which points the platform can stop at. This took quite a bit of brainstorming.
I did end up being frustrated with moving the points within the inspector, so I also decided to test myself and I created an editor script for the platform.
I learnt how to use ‘Handles.PositionHandle’ with the Unity Editor. This was to allow the player to move the positions within the editor rather than having to alter the values in the inspector.
All in all this was a productive week and I stretched myself to learn something new as I have already had past experience with Unity.
Week 3
This week was all concentrated on getting my first person controller working.
I had to change the ‘PlatformGrip’ script to allow the CharacterController to be attached to the platform. This took me quite a while to figure out as the CharacterController does not work the same as rigidbody. I ended up looking it up after struggling for a while and found out that the platform needed to move in ‘FixedUpdate’ rather than ‘Update’. This is something I will have to work on; research when I hit a roadblock.
I also created a ‘PlayerStats’ script to hold all the experience and leveling up. I removed these from the player script to neaten things up a bit and allow for easier debugging.
Other than recreating the scripts to allow for my new controller not much was achieved in terms of progress.
Week 3 Extra + Week 4
This week I decided to give my game an aesthetic as we had an extra week due to a public holiday. I used this opportunity to stylise my game and make it very pleasing to play.
I implemented post processing, custom textures and materials, and level design. I also added a UI to allow the player to see how many jumps they have, their experience, and also their current level.
Oddly enough I even decided to do some voice acting. I added a narration and an intro animation before the player starts playing. This was just for fun and to see if I could do it.
The level was a short and sweet test level that allowed all aspects of implemented mechanics to be tested. This included multiple jumps, leveling up, pickups, platforms, and chests.
I did learn some things on level design. Having some people play my level it wasn’t obvious on what the player was supposed to do other than reach the top. Players got confused when they couldn’t progress in each section as I intended them to come back after gaining enough levels.
I also learnt that players did not understand that they had extra jumps. I did think about this before, but didn’t bother with adding it. The player wouldn’t know that they got a new jump as their was no feedback other than a small number changing at the bottom of the screen. A solution could be curved lines around the center of the screen, each line section representing an extra jump they can do. Also adding an effect when the player levels up.
Final
I’m glad I stretched out my game as I learnt a few things on the way.
- Extra functionality in Unity that I didn’t know about before
- How to sync animation and audio with the animator
- Level design
- Voice acting… I suck
- How to listen to criticism
I also need to learn to use ‘[SerializeField] private’ instead of ‘public’ whenever the field is member only and it needs to be edited in the inspector. I do use properties, they are very useful.
My main take-away with this project is player feedback. Getting a second opinion can be beneficial and potentially help you fix problems that you would never has noticed.
I enjoyed helping others with their projects as I enjoyed their feedback about mine.
